Cashculator 2.3 introduces a significant new way to interact with your finances: the Transactions Sidebar. Using the Transactions Sidebar, you can:
- Search for a particular transaction or set of similar ones
- Filter transactions by date, description, or amount
- List transactions in date or amount order (most recent to farthest back, most money to least, or the reverse)
You can take the same actions on any transaction in the sidebar that you can take from the usual cell view, meaning you can edit, move, copy, or delete right from the sidebar.
Showing and Hiding the Transactions Sidebar
To display the Transactions Sidebar, click its icon on the top right of the main window, next to Reports. You can also choose Show Transactions from the View menu or use the keyboard shortcut Command-T to show and side the sidebar.
Click Transactions or press Command-T to show the sidebar.
Initially, the sidebar shows the transactions that were most recently changed (either edited or created), but you have lots of options to change what displays here.
Note: transactions shown in the sidebar match the currently selected view: Income or Expenses and then Actual, Plan, Both, or Combined. The Transactions sidebar is only available when working with Income or Expenses, not from the Reconcile or Reports screens.
Finding a Transaction
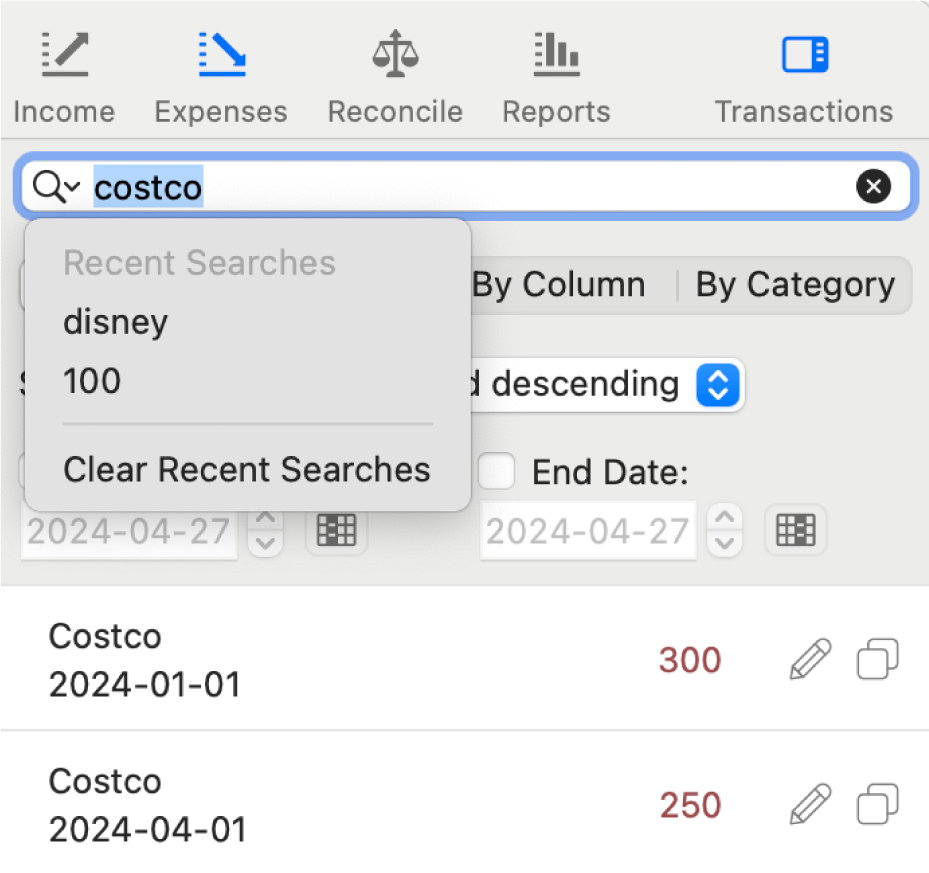
Use the Search bar at the top of the sidebar to look for text in a transaction’s Description or to search for an Amount. Click the disclosure triangle next to the magnifier to see your saved searches, which appear here when you press Return in the search bar.
Search in Description or Amount or repeat a prior search.
Filtering Transactions
Transactions shown in the sidebar are always filtered by Income or Expenses and by Actual, Plan, Both, or Combined.
You can further refine this using the tabs underneath the search bar, which can offer a speedy way to take a look at your data.
All shows all the transactions matching the current search, or the most recent transactions if no search was entered.
By Selection shows all the transactions in the currently selected table cell.
By Column shows all the transactions in the currently selected week or month in the table.
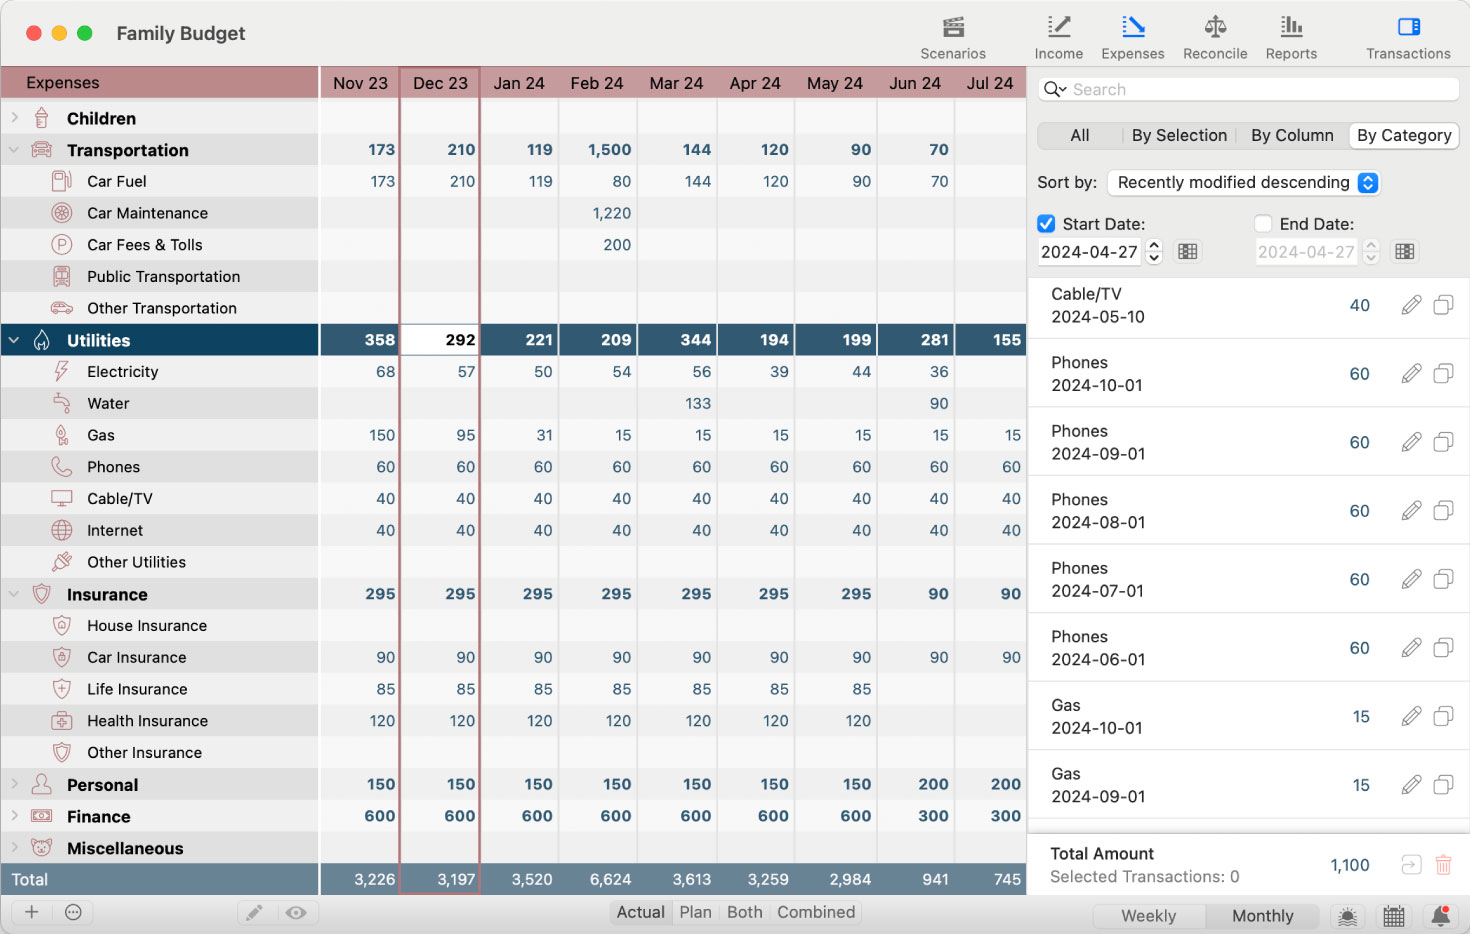
By Category shows all the transactions in the currently selected category or group.
Use the sidebar’s tabs to get a faster look at any table.
You can also use the Start Date and End Date controls to display only transactions that fall within a certain time period. Tick one or both of these boxes and set your desired dates to activate these controls.
Sorting Transactions
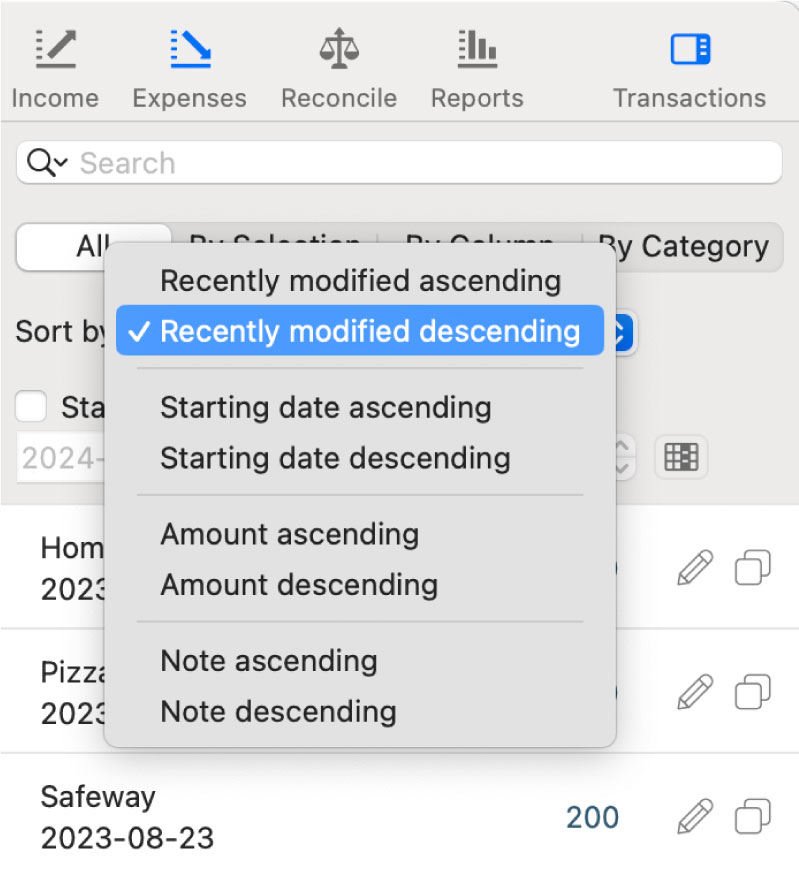
You can choose how you’d like to sort the transactions that match the selected tab, search term (if any), and date range (if selected) as follows:
Recently modified ascending shows the transaction that was last added or edited first.
Recently modified descending shows the earliest added or edited transaction first.
Starting date ascending shows oldest planned or actual transaction by date first.
Starting date descending shows the latest planned or actual transaction by date first.
Amount ascending shows the smallest amount first.
Amount descending shows the largest amount first.
Note ascending sorts alphabetically by Description, so Health Insurance would come before Life Insurance. Transactions with identical descriptions are sorted by date, with most recent first.
Note descending sorts transactions by Description in reverse alphabetical order, Z to A.
Click the drop-down list to sort transactions.
Dragging & Dropping From Sidebar to Table
You can drag a transaction from the sidebar into a different category under the category name column, which can be an easier way to rearrange data than using a transaction’s Move button.
Categorizing Imported Data
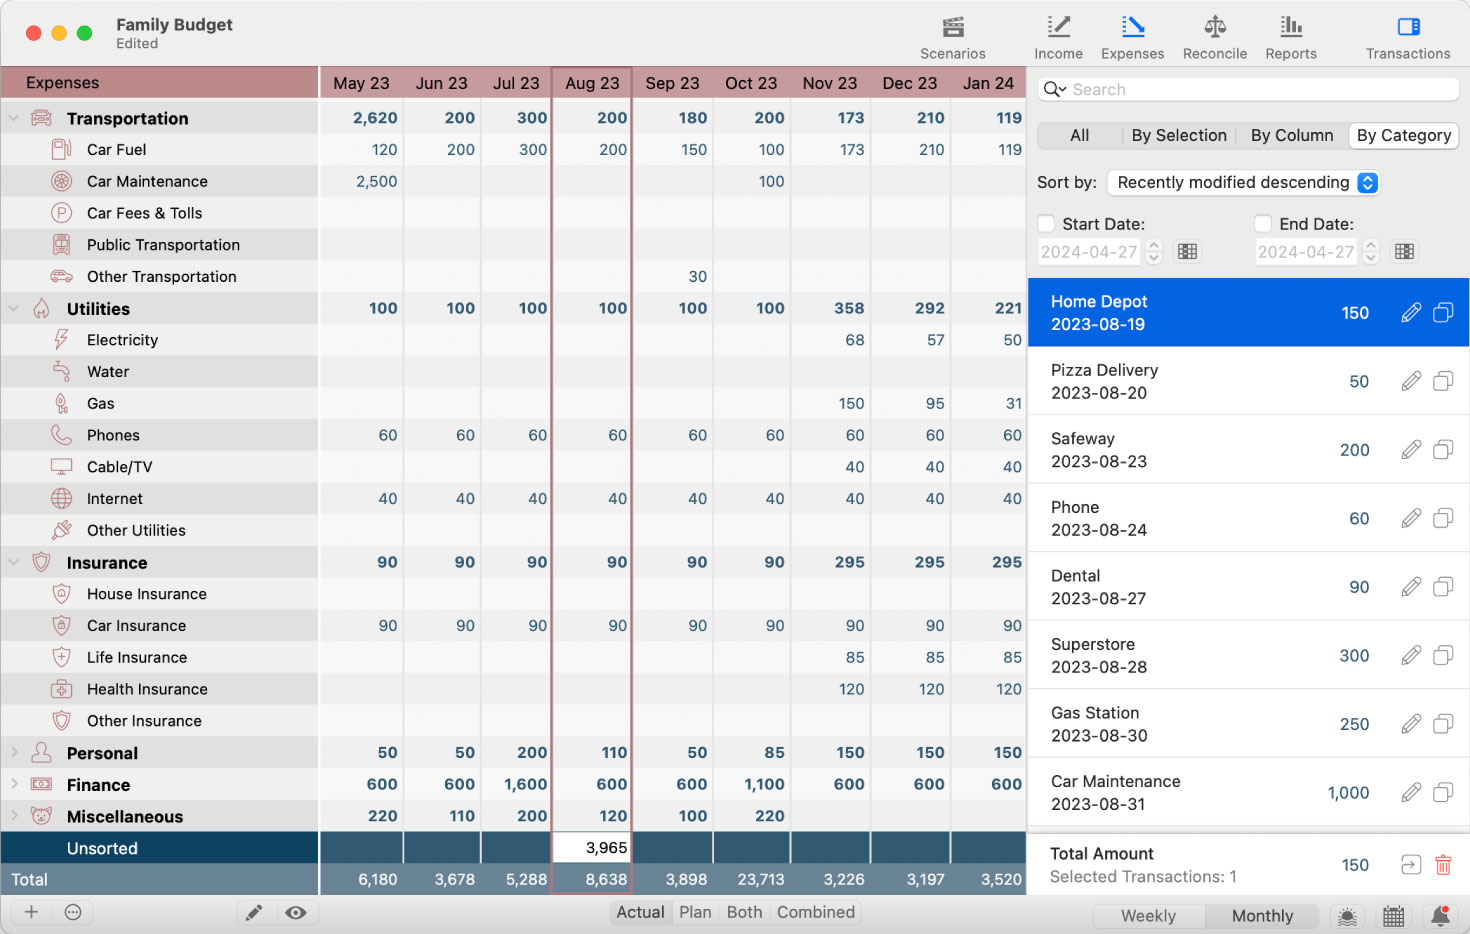
One handy use for this is when you’re importing from a CSV. Instead of selecting a category in the Import window, you can instead let Cashculator import everything into the Unsorted category it creates by default for imported transactions without an assigned category. Then, use the sidebar to drag each expense or income transaction where you’d like it to go.
You can rearrange transactions by dragging them from the sidebar and dropping them onto a category name in the table.
Selecting Multiple Transactions
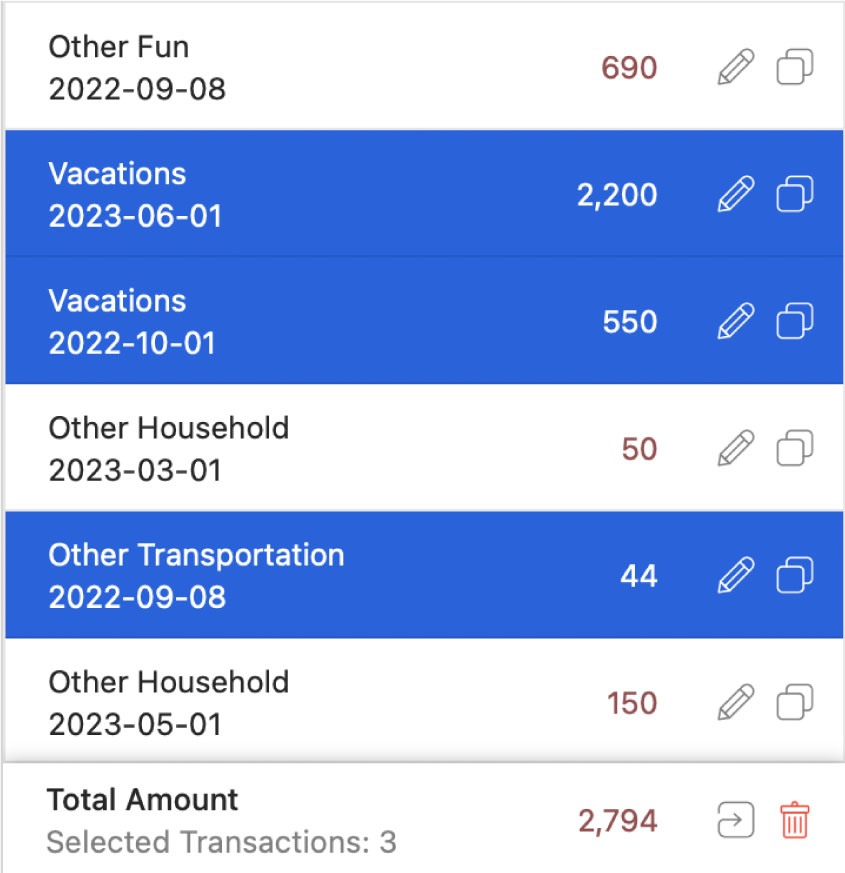
Easily select multiple transactions in the sidebar and perform actions in bulk, such as copying, moving, deleting, or rearranging them in the spreadsheet table. Selecting multiple transactions in the sidebar will also automatically calculate the total sum of the selected transactions and display the total amount at the bottom.
Select multiple transactions to see the total sum.
Keyboard Shortcuts
For our power users, we’ve introduced keyboard shortcuts for seamless navigation:
- Quickly switch focus between the spreadsheet table and sidebar by pressing ‘T’
- Set filter start and end dates using the currently selected column in the spreadsheet table with ‘S’ and ‘E’
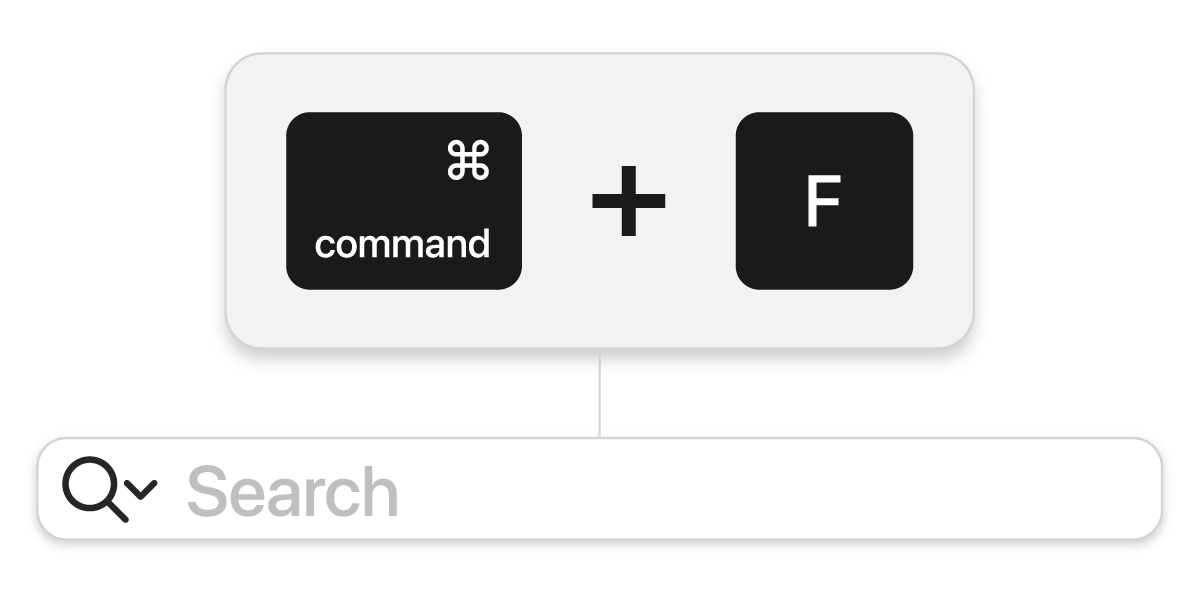
- Effortlessly locate any transaction using the sidebar’s search feature with Command-F
Search for a transaction using the sidebar with Command-F
Notifications
Cashculator 2.3 also includes the new Notification Center, which you can open by clicking the bell icon in the bottom right corner of the main window. When a small red dot appears atop this bell, that means there’s something new to read. There you’ll find a list of new blog posts, tutorials, and videos to help you use Cashculator more effectively. Double-click any notification to learn more. Notifications you’ve already clicked move to the Past Notifications tab, which you can review by clicking the clock icon. You can also Mark all as Read to move everything from What’s New to Past Notifications.
Click the bell to read notifications.
For a full list of changes in Cashculator 2.3, see the release notes, which you can also access from Cashculator’s Help menu.
Ready to take control of your spending?
Wish you could forecast future income, expenses and cash flow? Check out Cashculator — Personal Finance today.
Learn how the program works using the free version, then choose a monthly or yearly subscription to unlock unlimited income and expense categories.


