Beginning with Cashculator 2.2, you can bring in financial data from anywhere using CSV import.
-
-
- If you want to use Cashculator alongside or instead of another money management app
- If you already have some data in Excel (or any spreadsheet) that you want to bring into Cashculator
- If you want to save time entering information from your bank or credit card statement
-
What are CSV files?
CSV stands for Comma Separated Values. It is a simple, human-readable, text file format used to store tabular data, such as a spreadsheet. Just like it sounds, a CSV file consists of rows of data items, each separated by a comma. CSV files can be imported into any spreadsheet application, like Excel or Numbers. CSV files are just plain text, meaning that you can open them with any text editor if you prefer that over a spreadsheet app.
CSVs are often used to transfer data from one system to another, and most financial institutions allow downloading transactions in their accounts in this format, making them ideal for importing bank and credit card statements into Cashculator. So let’s learn how to do that.
Overview
The main steps for importing transactions from a CSV file into a Cashculator document are below. We’ll go over them in more detail below.
1. Starting the flow in Cashculator
3. Adjusting the categories into which transactions will be imported
4. Selecting which transactions to import
5. Action!
If prefer learning from a video, watch this one below, it covers the import process in about 6 minutes:
Starting CSV Import flow in Cashculator
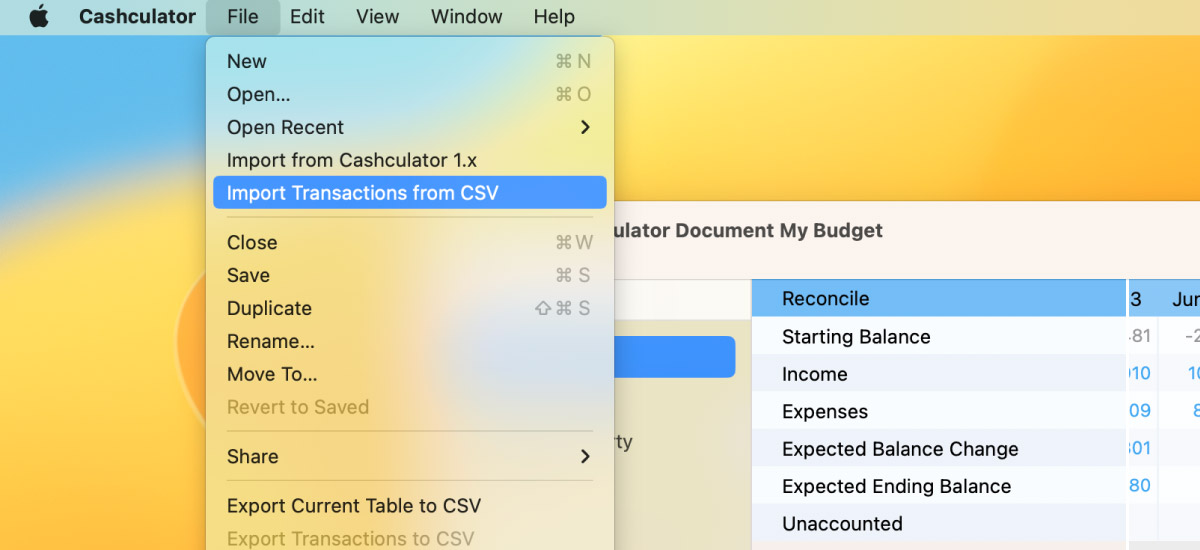
In the File menu, select Import Transactions from CSV. Next, select the CSV file you want to import and click Open. Cashculator will parse the transactions in the file and present it in a table in a newly opened dialog.
Selecting column types
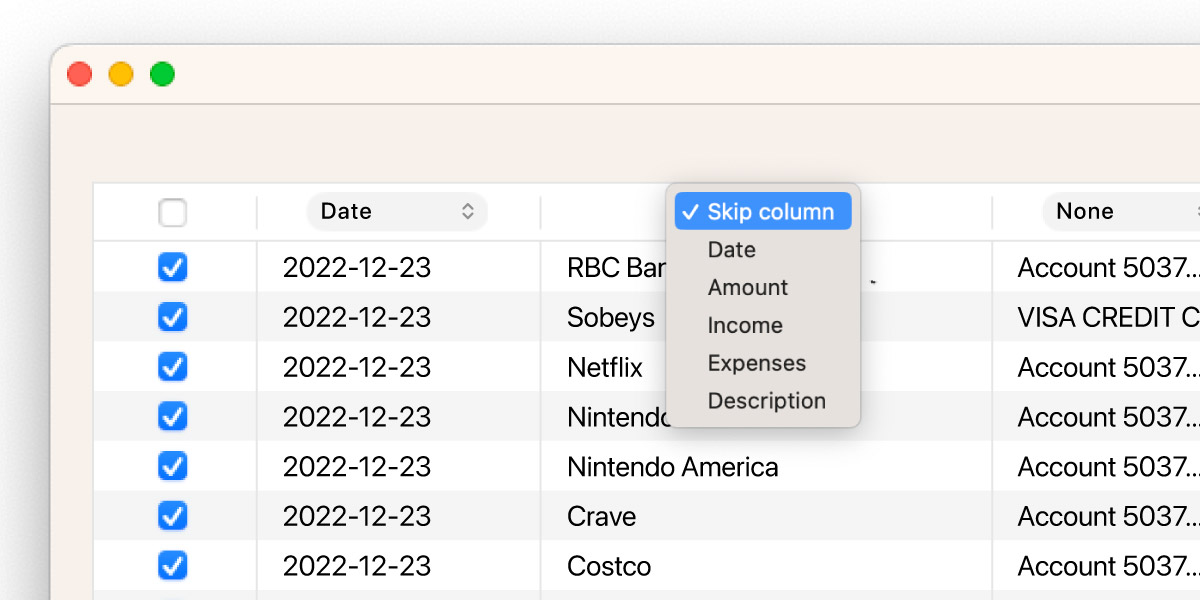
CSV files from different banks may have different data in the CSV file, and their structure may differ. To proceed with the import, Cashculator needs to know which columns represent the following information: date of the transaction, amount of the transaction, whether it’s income or expense, and optionally, a description.
Above each column, you’ll find a dropdown control to set the column type, including the option to skip the column if you don’t want to bring that column’s data into Cashculator. Most columns start in the Skip column state. Simply click the column header dropdown to choose a different type for the column.
Date
Cashculator will try to automatically detect the date column, but if the file has more than one column of dates (such as transaction date as well as settlement date), you may need to choose which you want to use. To prevent ambiguity, the selected date column will always present its dates in the year-month-day format.
Description
For Description, select the column containing the text that best describes the transactions. Most statements will have at least one such column. They will be saved into the Description field of the imported transaction.
Amount, Income, Expenses
To import the amounts, there are two approaches to selecting column types, depending on how the data in your CSV file is represented.
Some files will have separate columns for income and expense transactions. In this case, select the corresponding option for each. If your statement only shows expenses (even negative expenses, like statement credits including for returned items), you can select a column to be expenses.
Other files will have one column that lists both incoming and outgoing transactions, usually differing by their sign. In that case, select Amount as the column type. Cashculator will assume negative transactions are expenses and import them into Expenses, if no category is specified, but with a positive sign.
Choosing categories for imported transactions
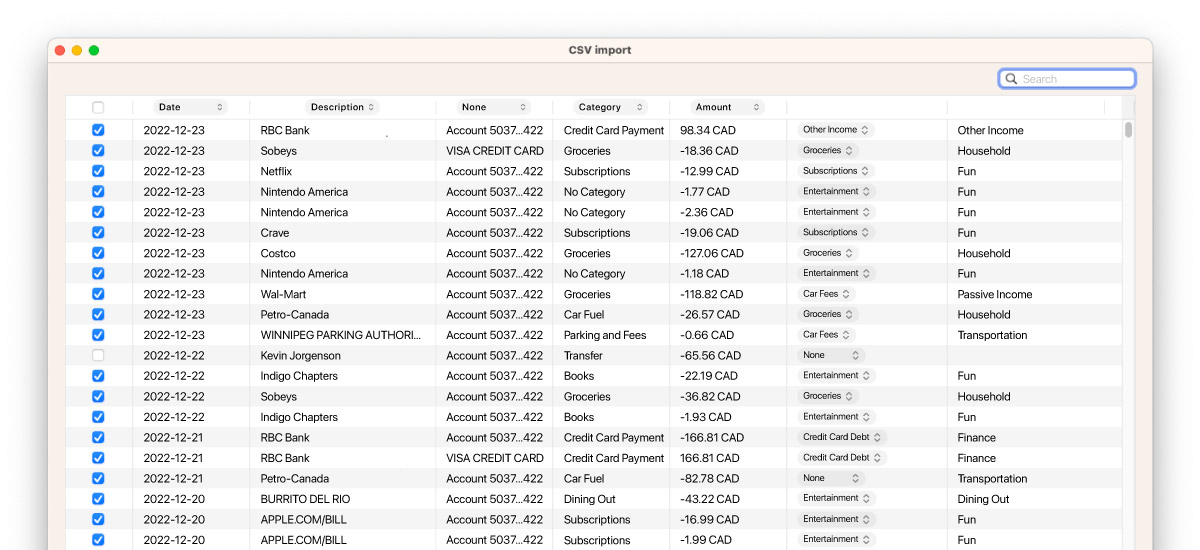
For each row, you can choose the category into which the transaction from that row will be placed. If you don’t specify a category (in other words, if the default No category remains), the transaction will be imported into a category called Unsorted at the bottom of the table. A category with this name will be added to the Income or Expenses screens automatically, if they don’t already exist.
You can sort unsorted transactions later using the Move commands from the list of transactions for a cell. That being said, it’s more efficient to choose categories in the import window.
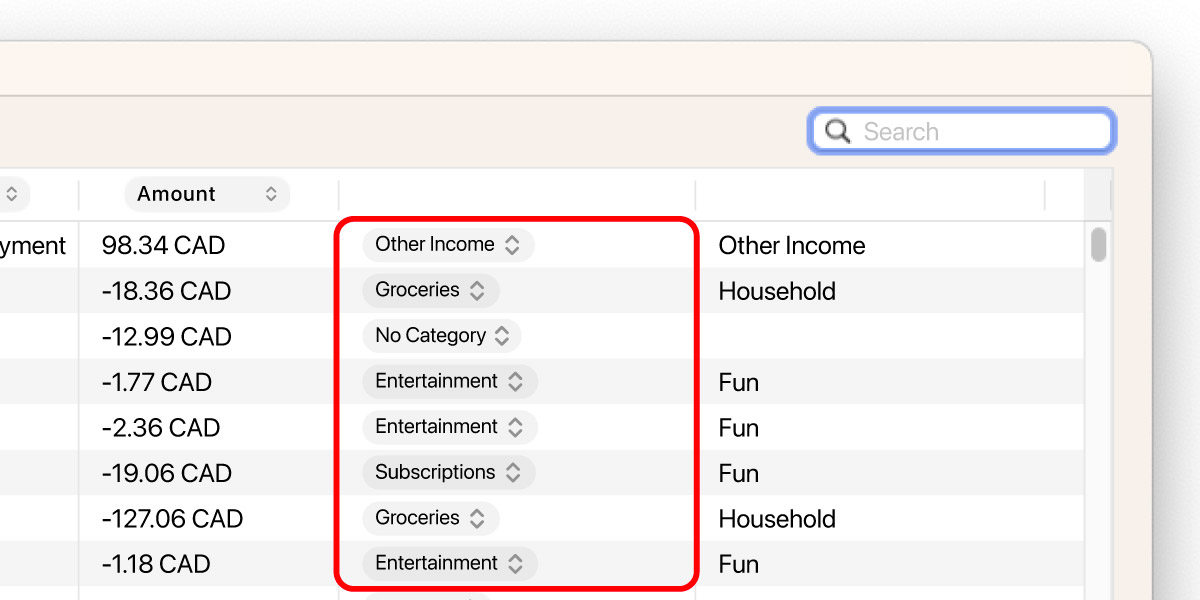
The Selected Category column in the table appears to the right of the data in the CSV file. Choose the corresponding category for the row by clicking on the button in that column and choosing from the list.
Automatically matching categories
When you choose a category for a row and a description column is selected, Cashculator will remember which category corresponds to which description. Next time you import CSV files, descriptions identical to previously saved matches will be pre-populated with their corresponding categories. In other words, although it may be slow going the first time you import a particular data source, Cashculator remembers your choices and it will go faster next time. Rest assured, you can always change these matches manually and your choice will be updated.
The data for automatic matches are saved in the document and are not shared between different documents.
Selecting categories for multiple rows
If multiple rows should be imported into the same category there are faster ways to do so instead of choosing the same category for each row one by one.
Here are two time-saving approaches:
1. You can select more than one row at a time using the usual macOS methods like dragging across rows, Shift-clicking for selecting between clicked rows or Command-clicking for adding or removing individual rows to the selection. Then select a category using a button on any of the selected rows. Once a category is selected, all the selected rows will update with that category.
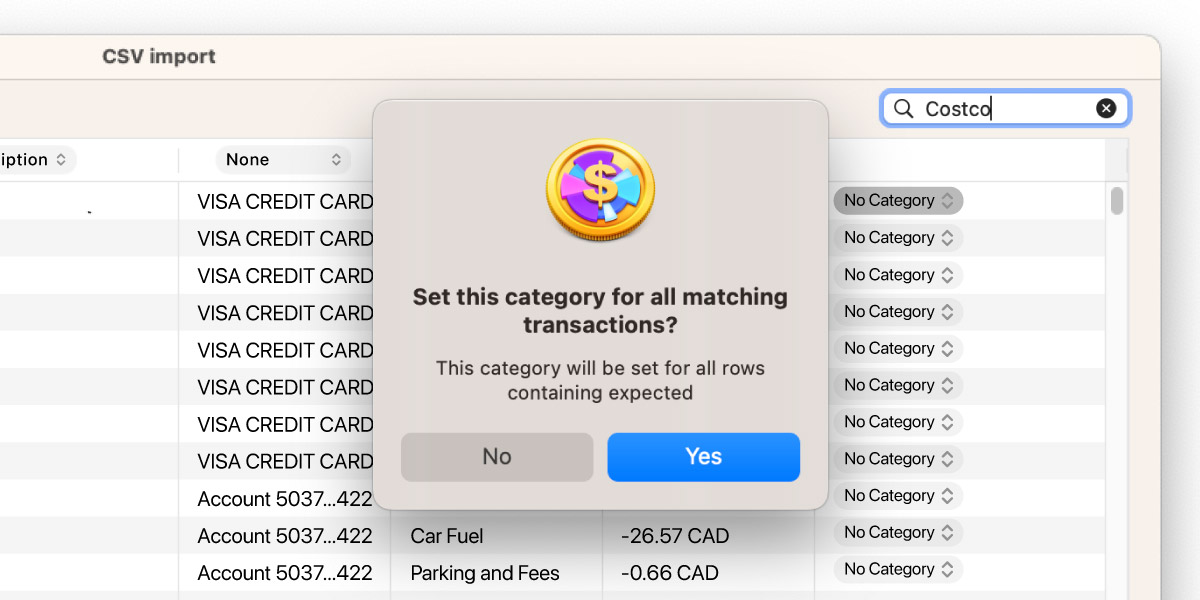
2. You can filter transactions by description using the Search field in the upper righthand corner of the table. When you enter text, only rows that contain the specified text in any column will be shown. Choose a category for any of the rows. Cashculator will show an alert asking you to confirm that you wish to apply that category to all the matching transactions.
If a chosen category is inside a group, the name of the group will appear in the rightmost column of the table for your convenience.
Selecting which transactions to import
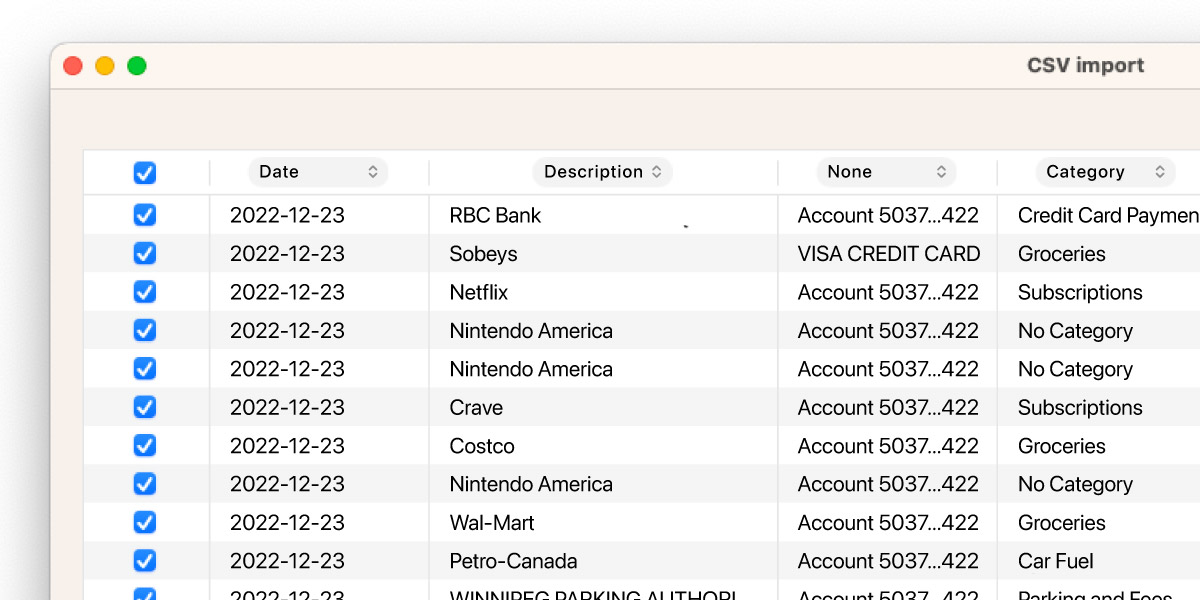
Before you proceed to import, you have the option to fine-tune the list of transactions that will be added to Cashculator. By default, no rows are selected for import. Each row has a checkbox in the first column to its left and you can check or uncheck each row individually. To select or deselect all rows, you can click the checkbox in the header of that column.
When you select a category for a transaction, its row will also be checked automatically.
Action!
Once everything is set up, click Import on the bottom righthand corner of the screen. If the button appears greyed out, it means Cashculator needs a bit more information before finishing the import. Make sure that at least one row is checked for import and that Date and Amount columns have been identified.
If you find some incompatible CSV files or have other concerns, questions or suggestions, feel free to write so on our forums or write to our support.
Ready to take control of your spending?
Wish you could forecast future income, expenses and cash flow? Check out Cashculator — Personal Finance today.
Learn how the program works using the free version, then choose a monthly or yearly subscription to unlock unlimited income and expense categories.
